Back in early February I shared that I was taking an oil painting class. I used to paint in oils when I was a teenager and did a number of paintings back in the day. I completed my project for my current class but what I learned was I was not as interested in getting back into oil painting as I thought I might.
My project came out OK, I just didn't enjoy the process of painting with oils.
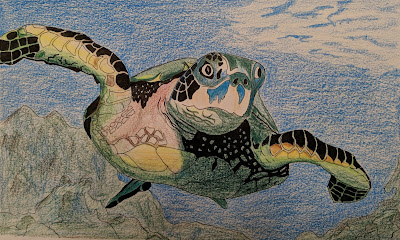
Currently I'm taking two drawing classes and I am enjoying those classes much better. One class is titled; "Anyone Can Draw." The other is titled; "Drawing Wildlife." The first class is your basic drawing instruction in shapes, tones, shading, detailing, etc... In the second class, "Drawing Wildlife", the instructor is having us draw using a grid method in order to help us with perspective and spacial relationships. I actually was taught that method in a high school art class many decades ago, so I was somewhat familiar.
I have to say I'm having a considerable amount of success using this method and am really enjoying completing my projects in this class.
The "Drawing Wildlife"
instructor has forbidden us using pictures of our pets as subjects in his class but I got a picture of Buddy romping with the neighbor's dog Basker, and couldn't resist sketching it.
instructor has forbidden us using pictures of our pets as subjects in his class but I got a picture of Buddy romping with the neighbor's dog Basker, and couldn't resist sketching it.
The rest of this blog entry I'm going to describe and show the process of drawing with a grid system. It is so easy it may encourage the child artist in each of you to give it a shot.
First, you need to draw a grid very lightly (you will be erasing the grid at a later time) on your drawing paper.
(If you zoom in you can barely see my light pencil grid lines on the drawing paper.)
I like using 1" squares. The blue painters tape on the borders is to contain your drawing and coloring, either with colored pencils or water colors at the end. Next, draw the same number of squares on a copy of the picture that you will be drawing. If the picture is smaller you can scan and enlarge it to your target size or just draw smaller squares on the image so the number of squares on your image matches the number of squares on your drawing paper.
If you are using a computer image you can use Word to apply a grid (I insert a table with 1" squares over the image) and print the picture with the grid already in place. Then, start drawing.
Draw the image in pencil lightly either by transferring the images in each of the individual squares or by using the squares to identify points where the image crosses the horizontal and vertical lines of your grid and then connect the dots.
The next step is to ink in all of your pencil lines. Once you have the image inked in you erase all of the grid lines and stray pencil marks not covered with ink.
 At this point, if you have any shaded areas or thicker black lines that need to be filled in like the example drawing I'm using, ink those larger/thicker areas in at this time.
To color my drawings I'm currently using colored pencils but if you prefer, water color paint works just as well. One thing I learned in this class that is producing good results is to layer my colored pencils, light to dark. For this cactus, I colored the whole thing yellow. Then I started highlighting with orange followed by a lighter shade of brown and then a darker shade of brown. I think the cactus came out the best in this picture. For the background in the example above I just have the lightest shade for each of the areas.
Finally I use multiple colored pencils to layer in the background, light to dark in each of the areas, followed by highlights using the darkest colors for each area and shade of color. Color the background all the way to the painters tape. Carefully remove the painters tape and you have defined boundaries for your picture.
For any of you that draw, used to draw, or would like to take up drawing, I hope this information is useful and maybe even inspires that inner child artist lurking inside somewhere.
This link is to a page where I have all my drawings from both of my drawing classes to date saved if you are interested. (The drawings on the linked page are in chronological order from the first of each class to the present in order to represent my progress over time.)
About overlooked talent, my dad was always a big fan of the Roadrunner Cartoons and I would like to leave you with this last thought!
Rick


